The initial article about Smoggie firmware upgrade uses a Python script to install the firmware.
This can be too much for the usual Joe user, so here is, I hope, a simpler way.
What do we need?
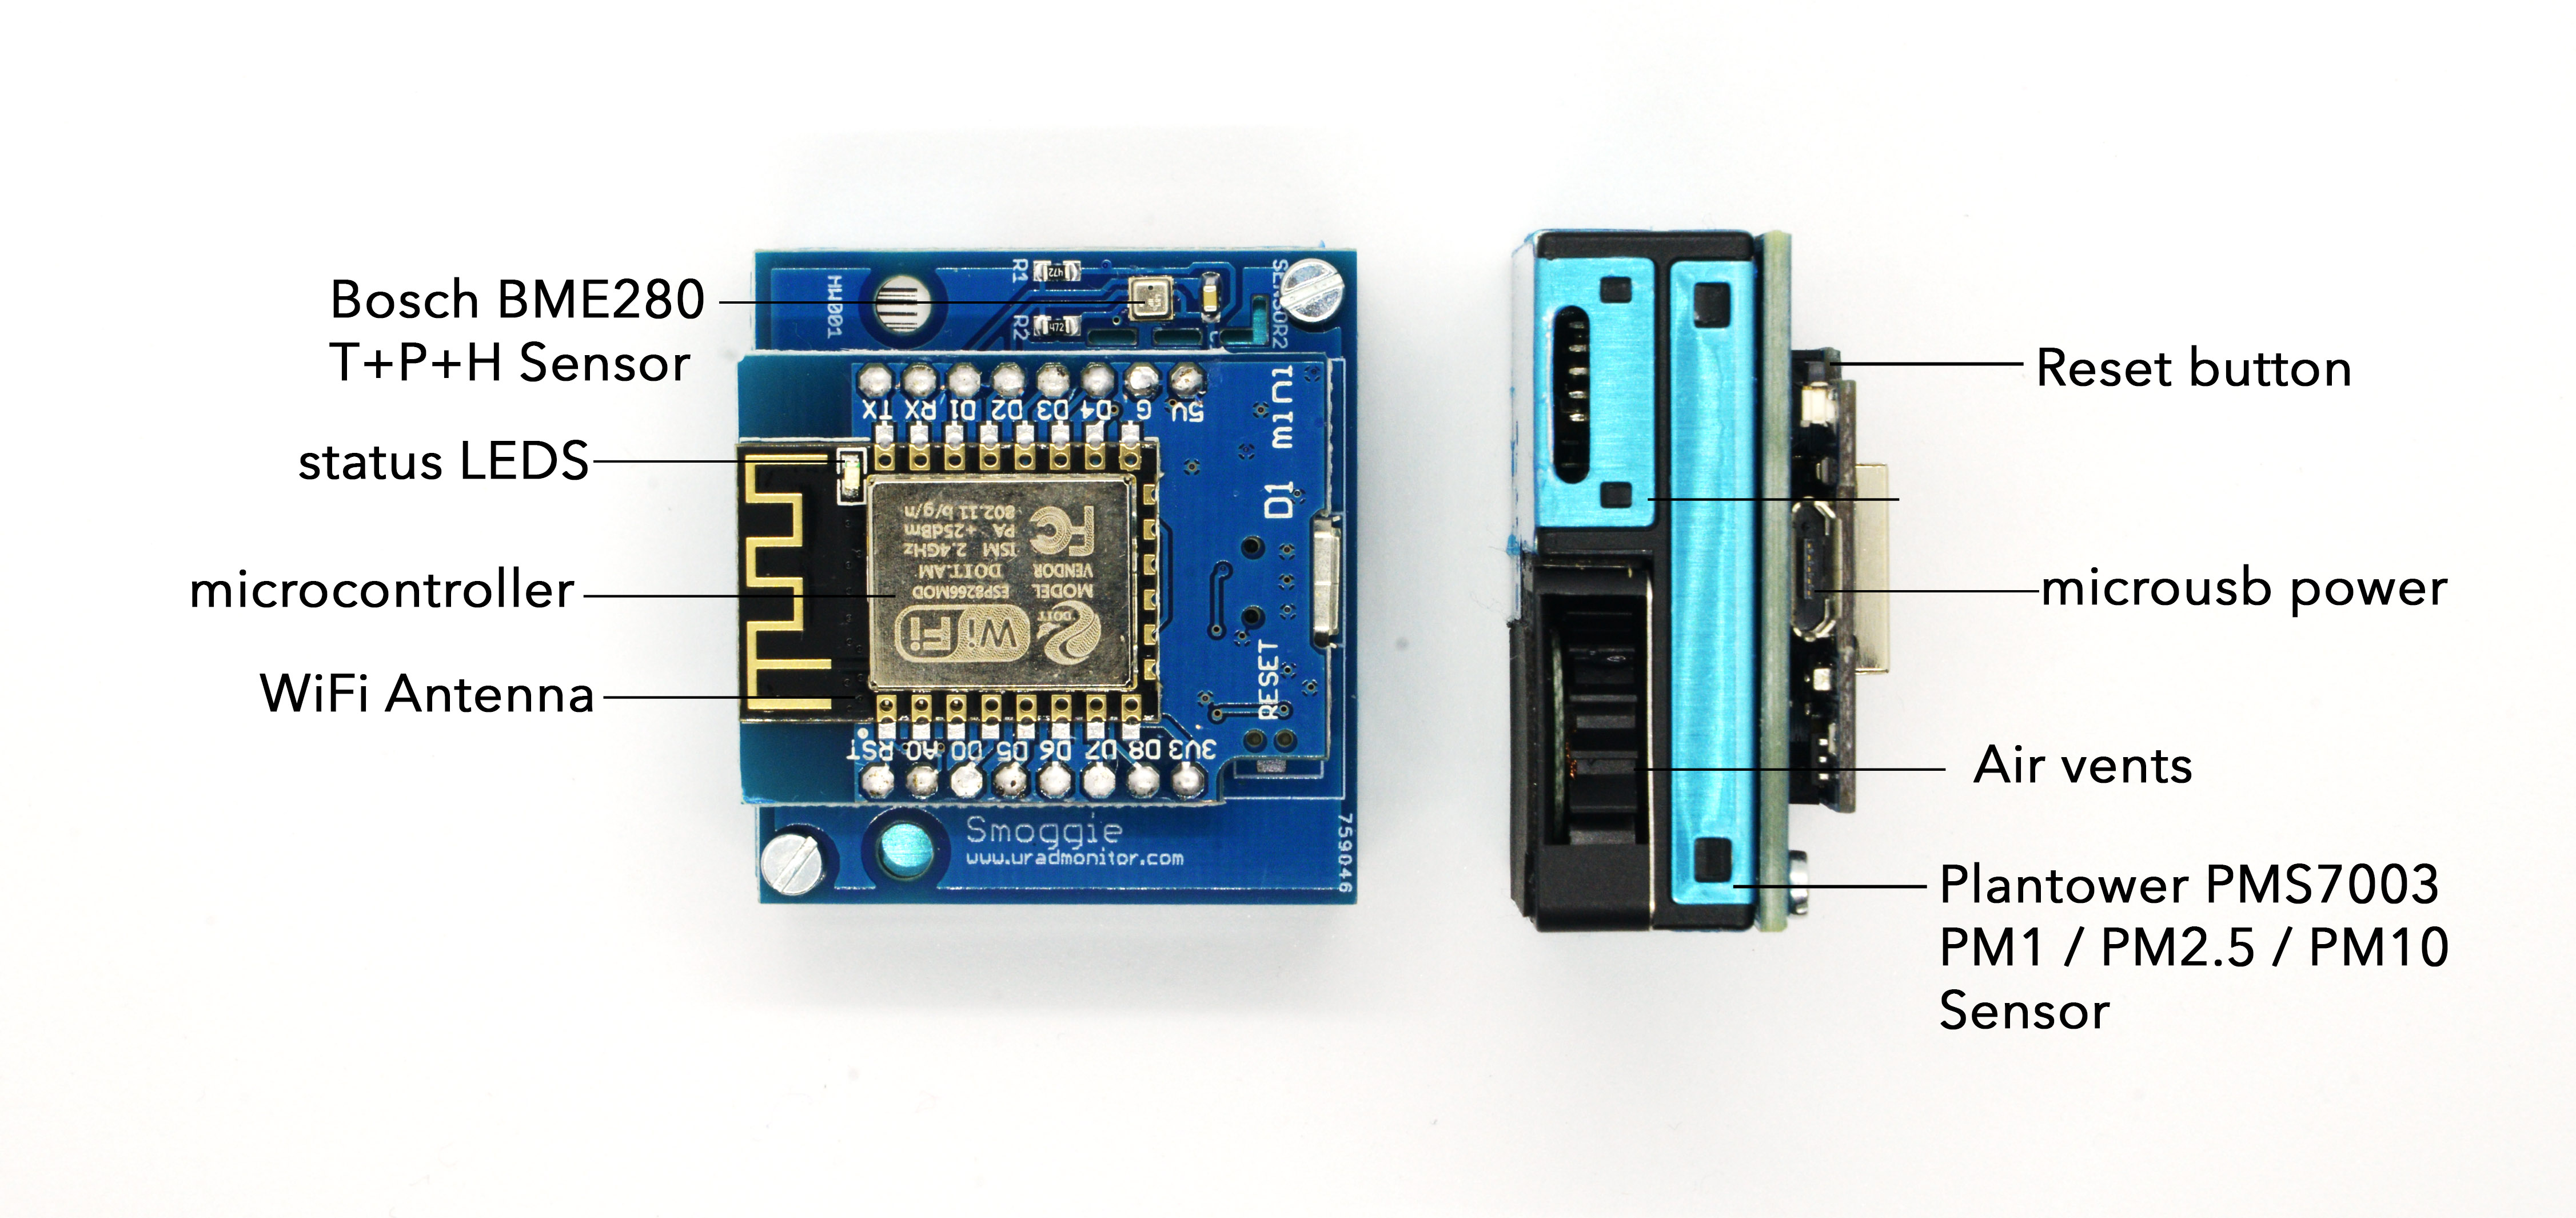
1. Smoggie hardware. (Smoggie-PM, Smoggie-CO2, and Smoggie-Gas)
2. The provided USB cable + a Windows-running computer.
3. The new firmware. For this contact us (send the model and the serial number printed on the device or the device ID from the map).
4. Download NodeMCU-Flasher – program to flash the sensor. Get the 32-bit version or the 64-bit version.
How to install firmware?
1. Connect Smoggie to your computer. It will detect a Serial – USB adaptor.
In order to force the driver installation, go to Device Manager (Win Key + X – Select Device Manager), identify the device with an exclamation mark, click on the device, Driver -> Update driver -> Search automatic for the driver on the internet (it will get the driver from the internet).
2. Note the number of the COM port of the serial adapter. (COM4 for me)
3. Open the NodeMCU-Flasher program (ESP8266Flasher.exe).
4. Go to Config tab and select the firmware (.bin) file that you received from us.

5. Go to the first tab, select the COM port. (COM4 for me) and hit the Flash button.

The process will take about a minute. Wait another minute for the Smoggie to reboot, disconnect from the computer and connect to the USB power adapter. It should keep the original WIFI settings.
MAC OS
Sotirios reached in to share another tool for Mac OS. You can use the ESP8266Flash app available here: https://apps.apple.com/es/app/esp8266flash/id1344542675?l=en&mt=12
Catalin wrote another excellent article on how to run the update on MacOS. Check it out here.
When ready,
Go on the uradmonitor map, select your sensor and check the new firmware (SW) version.
Here’s one final step to do, thanks to Wolferl:
There are some things to keep in mind with that updating process:
When I updated my Smoggie PM from version 18 to 22, it did not longer login to my Wifi network, and the values shown with “getdata”, were completely unplausible. Wifi access data were all mangled up.
When updating, you need to erase the NVM (nonvaloatile memory) in the device, since the EEPROM locations may have been changed between versions.
To erase it after the flash, one needs to gain serial access and issue the (yet undocumented) “default” command. From there on, the device can be set up via its default access point (AP, uradmonitor-06 in my case) or the serial port via USB.
Version 22 now supports deactivation of the builtin AP, so that other people cannot take it over so easily. This is only useful if your device is connected to your wifi network.
To do this, there is a “disableap” command (also yet undocumented) which has a number as parameter. That number gives the time in seconds how long the AP will be active after bootup. I used 60, so you still have a chance to login in case you need to.
Happy updating,
Wolferl

Yes! For macOS user like myself I use the ESP8266Flash app available which worked with my Smoggie
https://apps.apple.com/es/app/esp8266flash/id1344542675?l=en&mt=12
Thanks, I added this to the post!
There are some things to keep in mind with that updating process:
When I updated my Smoggie PM from version 18 to 22, it did not longer login to my Wifi network, and the values shown with “getdata”, were completely unplausible. Wifi access data were all mangled up.
When updating, you need to erase the NVM (nonvaloatile memory) in the device, since the EEPROM locations may have been changed between versions.
To erase it after the flash, one needs to gain serial access and issue the (yet undocumented) “default” command. From there on, the device can be set up via its default access point (AP, uradmonitor-06 in my case) or the serial port via USB.
Version 22 now supports deactivation of the builtin AP, so that other people cannot take it over so easily. This is only useful if your device is connected to your wifi network.
To do this, there is a “disableap” command (also yet undocumented) which has a number as parameter. That number gives the time in seconds how long the AP will be active after bootup. I used 60, so you still have a chance to login in case you need to.
Happy updating,
Wolferl