This is a guest post written by a long time user of the excellent uRADMonitor devices that has recently retrofitted his house with the awesome Home Assistant brains. This article assumes you have a basic knowledge of Home Assistant and how to use it’s config file config.yaml.
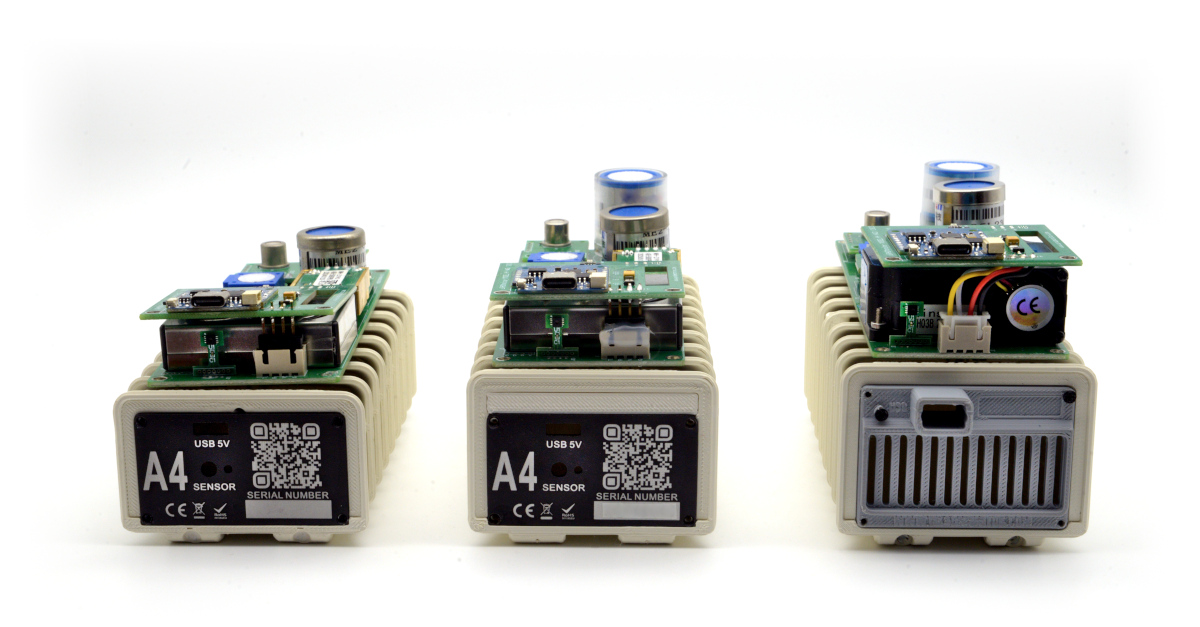
uRADMonitor Radon is a newly launched product, that I was very lucky to get my hands on as I just moved to a new house. I was afraid that the extremely dangerous radioactive radon gas which emits the alpha nuclear radiation and it’s found almost anywhere in the ground, may also infiltrate in my house. This is especially more important now that we work at home more and spend a lot more time indoor.
https://www.cancer.org/cancer/cancer-causes/radiation-exposure/radon.html
Integration
Let’s cut to the chase, probably most of you are reading this article for this particular info – what’s the easiest way to consume/read the data provided by uRADMonitor in Home Assistant?
Well, look no further, the JSON API provided, satisfies this very easily and with a little configuration put in the config.yaml, we are ready to hit the ground running.
First, you’ll need the local IP address of your uRADMonitor looking to integrate (additionally, I recommend setting the DHCP on your router in such a way that it allocates the same IP to your device, otherwise you’ll need to update the config.yaml periodically).
My local IP of my uRADMonitor device is 192.168.1.202 and when looking at this particular URL as provided by their docs:
http://192.168.1.202/j
where I get this lovely JSON output:
{"data": {"id":"1D000XXX","type":"1D","temperature":18.66,"humidity":57.38,"pressure":101355,"radon":84,"uptime":128050}}
Now that we’ve got our hands on the data, we can consume it easily in Home Assistant with the use of the rest platform and by creating a bunch of sensors.
  - platform: rest
    name: urad_sensors
    resource: http://192.168.1.202/j
    json_attributes:
      - data
    value_template: "OK"

  - platform: template
    sensors:
      urad_temperature:
        value_template: "{{ state_attr('sensor.urad_sensors', 'data')['temperature'] }}"
        device_class: temperature
        unit_of_measurement: "°C"

      urad_humidity:
        value_template: "{{ state_attr('sensor.urad_sensors', 'data')['humidity'] }}"
        device_class: humidity
        unit_of_measurement: "%"

      urad_pressure:
        value_template: "{{ state_attr('sensor.urad_sensors', 'data')['pressure'] }}"
        device_class: pressure
        unit_of_measurement: "P"

      urad_radon:
        value_template: "{{ state_attr('sensor.urad_sensors', 'data')['radon'] }}"
        unit_of_measurement: "Bq/m3"
The only things you would need to customise are your IP and your list of sensors, for example:
 urad_XXXXXX:
        value_template: "{{ state_attr('sensor.urad_sensors', 'data')['XXXXXX'] }}"
        device_class: XXXX # not mandatory, you can comment this line entirely
        unit_of_measurement: "XXX"
That’s it, after your next restart of Home Assistant, the sensors named “urad_xxxxx” should be available for you.
Going the extra mile – Grafana
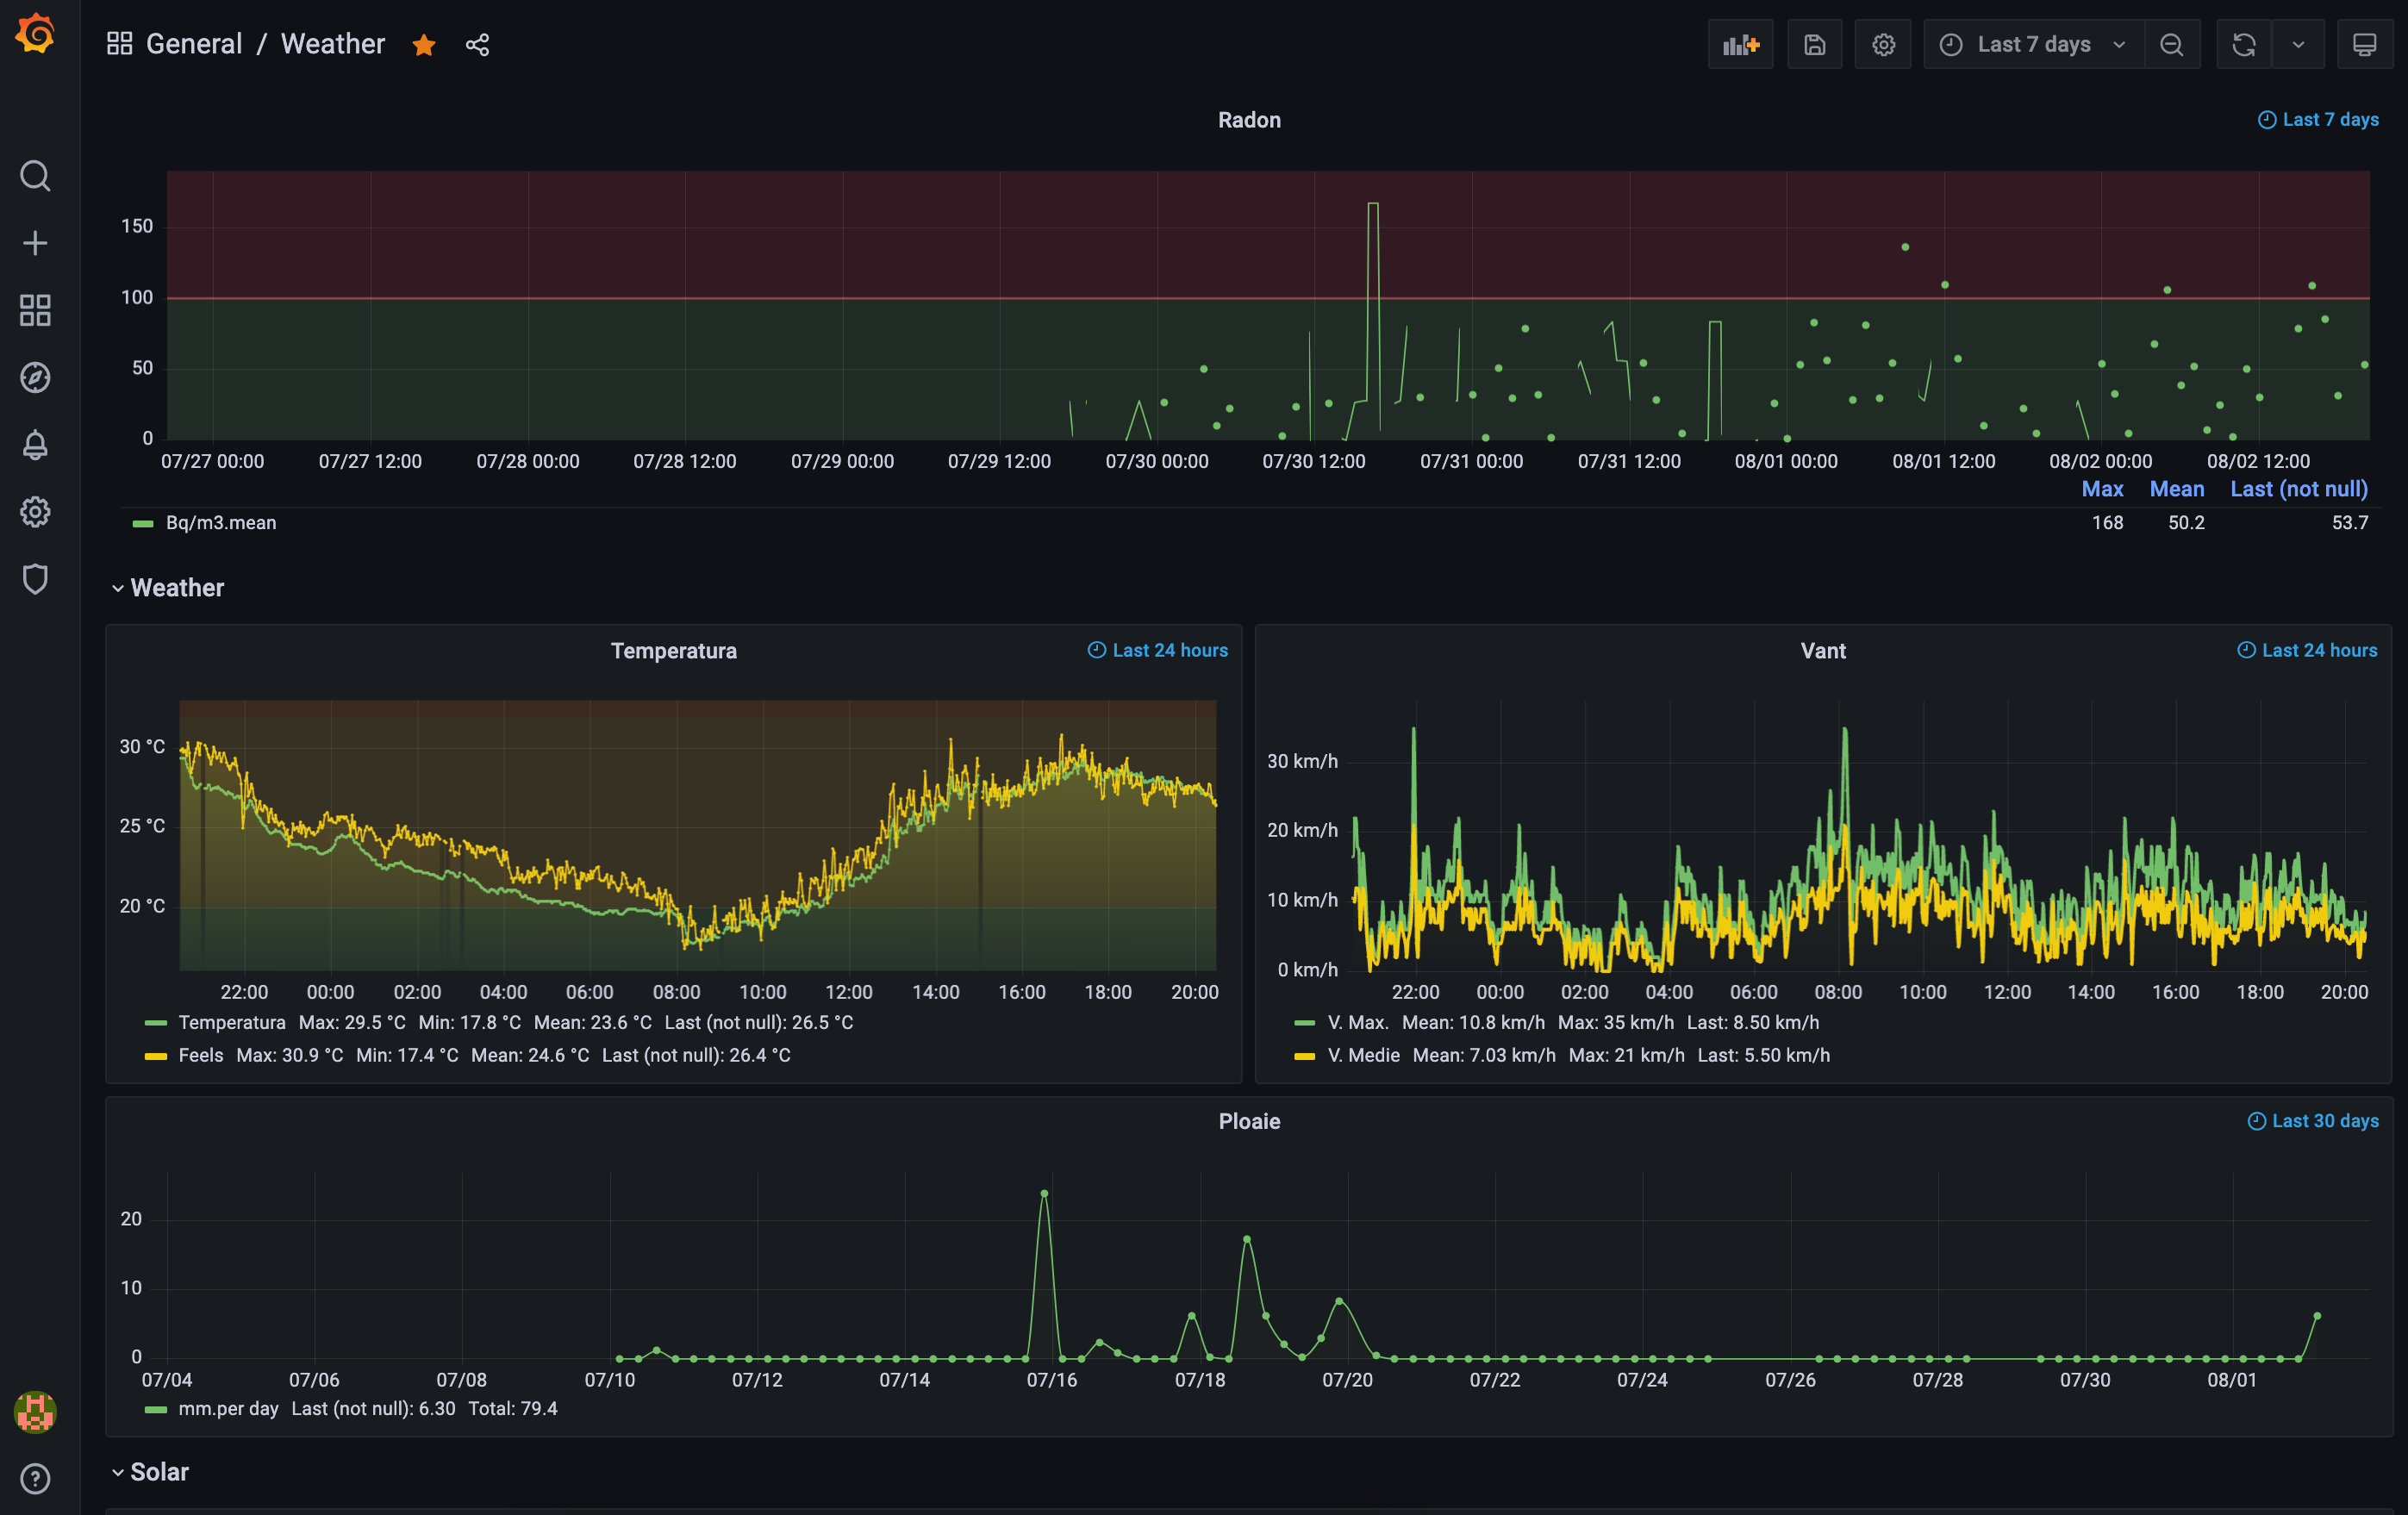
Because I’m a data freak, I like to turn raw data to beautiful information, so here’s my Grafana graph plotted with the radon radiation data:

As you can see I have frequent crossings over the 100 Bq/m3 which is the limit over which the radon radiation becomes very dangerous, raising the risk of lung cancer. Luckily it’s just for short amounts of time and it drops fast when I open my window, or even better, when my beloved Home Assistant turns on automatically the HVAC ventilation to bring some fresh air inside.
codemore code
~~~~